Wrestling with Windows S Mode

Background

I was setting up a new PC for a client yesterday. It shipped with Windows 11 Home edition, and I agreed to upgrade to Windows 11 Pro using a license key he’d purchased.

I prefer to do a fresh install to minimize bloatware, and created a bootable USB drive with the installation media for that purpose. During installation, instead of allowing me to select the edition I wanted to install, it just defaulted to Windows 11 Home:

The installation did not include an Edition Configuration file (EI.cfg) in the .\Sources folder of the installation media, so I created one:

EI.cfg

[Channel]
_Default
[VL]
0

After restarting the installation, I could now choose the Windows 11 Pro edition and complete the installation. On completion, I logged into the PC, and to my dismay, it was configured as “Windows 11 Pro S Mode“…

About S Mode…

The ‘S’ stands for s***…

It’s a neutered version of the OS that only allows you to install S Mode-compatible applications from the Microsoft store, disables access to most configuration options, other browsers apart from Microsoft Edge, and disables access to Command Prompt and PowerShell. Who would want this?

Hint: not me, and if you’re reading this, not you either.

Catch 22!

Although I’d successfully installed Windows 11 Pro, I could not activate it because the OEM had preinstalled the Windows 11 Home license key in the BIOS. To update the key, I needed to disable S Mode, but I couldn’t do that without first activating Windows…

Getting Around It…

I tried…

  • Manually inputting the Windows 11 key using a PID.txt file in the .\Sources folder of the installation media to override the Windows 11 Home key on installation.
  • Logging in with a new Microsoft account, assuming the Windows 11 Home Edition digital license was bound to the Microsoft account I used to log in to the system for the first time before reinstallation.
  • Bypassing the Microsoft account creation process during installation. While I was able to use Shift+F10 to access the Command Prompt in some contexts of the installation process, neither oobe\bypassnro nor start ms-cxh:localonly worked.

To make things even more complicated, the touchpad and the Wireless NIC were not recognized by default! The latter had to be manually installed to progress through the installation process. As to the former, I simply had to do without (i.e., using keyboard shortcuts) until I got into the OS proper. I considered slipstreaming the drivers into the installation media, but it didn’t seem worthwhile…

Once More Into the Breach!

At this point, I had three options remaining:

  1. Give up, reinstall Windows 11 Home edition, and leave well enough alone.
  2. Reinstall Windows 11 Home edition, and then explore other options.
  3. Install Windows 10 Pro edition, then upgrade it to Windows 11.

Options 1 and 2 weren’t mutually exclusive, so I decided to start by installing the Home edition and then try to remove S Mode, which worked. Now that I had a Get button to use (it wasn’t present when Windows wasn’t activated), I could proceed.

Removing S Mode restored my option to update the license key, and after a reboot, I successfully upgraded to Windows 11!

Lessons Learned

This ordeal taught me that the correct upgrade path from Windows 11 Home S Mode to Windows 11 Pro is:

  1. Complete the initial setup as is on first boot, or if you want to get rid of the bloatware, reinstall the OS with Home Edition first
  2. Remove S Mode via the Microsoft Store on the activated Windows instance
  3. Change the license key to Windows 11 Pro and let it complete the upgrade
  4. Activate the new Windows 11 Pro installation

Because this particular system used a pre-installed Windows key, any attempt to install a different Windows 11 edition resulted in an [S Mode induced] Soft Lock Loop (see Catch 22 above). The only way off that crazy train is to install the same version it shipped with, and only then will you have the option to ‘Get’ the ‘Switch Out of S Mode’ app from the Microsoft Store, and the rest falls into place.

Parameter Hunting: Part II

In my last post on the subject, I discussed the concept of using Process Explorer to discover switches you can use for unattended installs/uninstalls used in enterprise software deployment.

Like before, I have a pesky setup.exe package that wants to guide me through an installation GUI, and would not respond to the usual setup.exe /s /q etc. and so forth…

This particular installer was for a very obscure serial hub manufacturer so there was Googling my way out of this; instead I needed to figure out what was used to build the installer, then work backward from there.

Once against, I launched my trusty Process Explorer (as Administrator) and inspected the setup.exe’s process…to my delight, scrolling down the “Strings” tab I came across this:

Note the string, “This installation was built with Inno Setup.” With that in mind, I was able to look up the documentation associated with the package builder to discover the built-in parameters I needed for silent installation.

While this specific technique might not work for every situation, it never hurts to have another tool in your toolbox!

Microsoft CSAT Survey II: Someone Listened!

It’s not often something changes for the better, but I’m always pleased when they do!

Once again, I’ve found myself tasked with attaining Microsoft Gold level partnership for my employer. For those who have never had the pleasure, the process consists of attaining a combination of competencies (associated certified professionals, tested products etc.), customer references and the dreaded CSAT (Customer Satisfaction) survey.

In the past, the CSAT consisted of 30 questions, many of which applied to Microsoft product resale, which isn’t applicable to many would-be partners.While questions could be added (though I can’t imagine why anyone would want to), none could be removed.

Since then (about April of 2013 or so), the survey was reduced to only 5 questions that actually pertain to customer satisfaction – imagine that!

It’s hard enough asking for a customer’s time to fill out a survey, but if I must, I’d prefer it be short and to the point. I believe this iteration of the CSAT does just that.

So why the change? Did someone at Microsoft read my 2009 rant on the subject and act accordingly? Doubtful, but it’s a nice thought anyway :). Regardless, I’m happy it did, and hope this trend continues!

A Tale of Two Plugs

I’ve been living and working in Saudi Arabia for about 8 months now, and in this part of the world, the most common outlet types I’ve encountered are the two pronged German “Schuko” CEE 7/4 plug and the three pronged British Standard 1363 plug (see image below):


From left to right: NEMA (ungrounded and grounded), German “Schuko” CEE 7/4, British Standard 1363.

The BS plug (no pun intended) is what came with my work-issued IBM Thinkpad, which came with me back to the States. When I returned to my office this morning and powered up my laptop, I was greeted with this:

Upon further inspection, I was able to determine why:

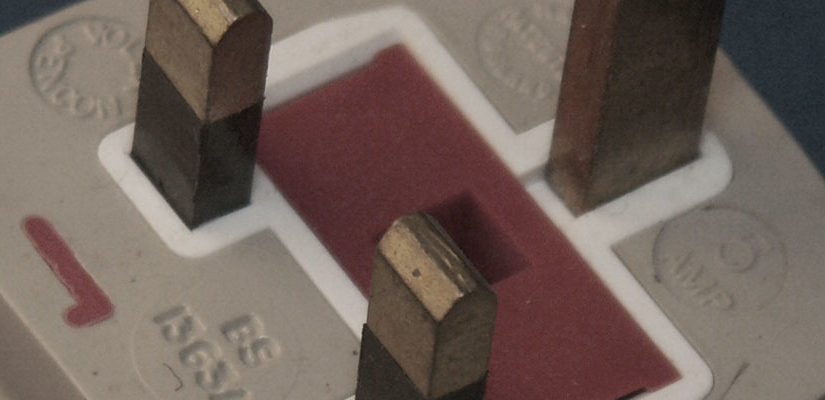
What you’re looking at are two deep scratches where the prongs of the BS 1363 plug impacted back of the display, fracturing the screen on the other side. The AC Adapter and Laptop were placed inside my soft case, which was packed in my checked luggage bag. The laptop and AC Adapter were placed in separate compartments of the soft case, which seemed to offer sufficient protection.

This kind of damage is virtually impossible to accomplish with a NEMA plug, and with the inner partition of the case between the laptop and the adapter, it never would have occurred to me that this could happen. Some BS 1363’s plugs feature folding prongs (e.g. SlimPlug, ThinPlug), though these products were developed to cope with size – nevertheless, my laptop AC Adapter wasn’t equipped with folding prongs…

The good news is, being a relatively new laptop, it’s still under warranty, and our vendor can come out and replace the display for me!

Moral of the story? If your device uses a BS 1363 plug, be sure to wrap something around the prongs to keep them from banging up other equipment it might be stored with during transport :).

Credits:
http://en.wikipedia.org/wiki/AC_power_plugs_and_socket

Disabling SSL v2 in Server 2008 x64 and Server 2008 R2

Disclaimer: Always back up your registry prior to making changes!

Incorrect entries can cause unexpected behavior, and may even render your operating system unusable! I disclaim any responsibility for damages, loss of data or any other issues resulting from registry changes.

While this worked for me, every environment is different, so use this at your own risk!

I recently assisted a client with getting a Windows Server 2008 R2 machine in compliance with Payment Card Industry (PCI) standards.

PCI compliance is very important for eCommerce sites and anyone handling credit card information.

We used a 3rd party testing tool that scanned for open ports, SSL version support, as well as allowed encryption/cipher combinations. The first few tests failed due to SSL 2.0 support in Server 2008 R2/IIS7.5.

I found an article on Microsoft’s support site which described how to disable IIS protocols by modifying the registry (this can’t be done through IIS Manager):

http://support.microsoft.com/kb/187498

Here’s where it gets confusing. I followed the instructions and browsed to:

HKey_Local_Machine\System\CurrentControlSet\Control\SecurityProviders\SCHANNEL\Protocols

As the article points out, the “SSL 1.0,” “SSL 2.0,” “SSL 3.0” subkeys are typically there. Note the use of the word Typically rather than Always, meaning that sometimes they’re bloody well NOT there, as was the case with my server!

The article goes on to say, “create a new DWORD value in the server subkey of the protocol.” I have big problem with this phrasing given the ubiquity of the word, “Server.” The instructions do not explicitly tell you to create a new subkey under “SSL 2.0” called “Server” and to place the DWORD in there, so naturally, I wrongly assumed that the DWORD went in “SSL 2.0” instead, which didn’t work.

After a little digging, I came across another a post on the IIS.net forums by a user named Pawel Dolny who did a much better job of explaining things:

http://forums.iis.net/p/1151822/1879690.aspx

When you follow his article, be sure to create subkeys called “Server” and “Client” in each of the SSL protocol keys, then add a DWORD in each called “Enabled” with a value of “0” to disable it (or 1 to enable it, as would be the case for SSL 3.0).

He also covers enabling/disabling ciphers. Once you’ve rebooted, you can test your site to verify the changes:

https://www.wormly.com/test_ssl

I hope this helps someone!