Input Form Validation Bypass Using the Browser Console

Disclaimer: The techniques described in this post are intended for educational purposes only, and specific details have been intentionally omitted.

These methods should only be used on systems you own, manage, or have explicit permission to access. Unauthorized access to computer systems is illegal and unethical. Always obtain proper authorization before performing intrusive or manipulative actions on a web application. I assume no responsibility for any misuse of the information provided!

Background

Recently, as part of my client’s periodic password change activities, they encountered a problem where the Password field on the web interface’s login screen supported fewer characters than what the password was set to, locking them out of the device.

To make matters worse (for reasons I can’t get into here), the web browser and a text editor were the only tools available to investigate, troubleshoot, and bypass the interface’s limitations.

Investigation and Troubleshooting

Using the web browser’s Developer Tools, I was able to inspect the Password input field to better understand what was happening:

<input name="pass" type="Password" size="16" maxlength="16" value="">

Looking at the last password vault entry, I saw that the password was 29 characters long, so I tried entering the same password truncated to 16 characters, but it wasn’t accepted.

Luckily, there were other identical devices in the environment, so I logged into another one and inspected the Change Password field on a hunch. Sure enough, it was longer!

<input name="passChange" type="Password" size="20" maxlength="20" value="***">

This told me that when the password was changed, it was truncated to 20 characters, not 16!

Getting Warmer…

Now that I had a clear[er] understanding of the problem and the correct password, I tried to manipulate the client-side HTTP by increasing the size and maxlength values to 20, but encountered server-side code calling a form validation function, preventing me from submitting password greater than 16 characters:

if (pass.value.length > 16) err.addError (pass, "Invalid or Missing Password"); 
    err.showError(); 
    return !err.hasError();

In order to get around the script, I tried bypassing the form using the browser’s console to manually set the user name and password and then submit the form without clicking on the submit button, triggering the validation function:

document.getElementsByName("user")[0].value = "[myUsername]";
document.getElementsByName("pwd")[0].value = "[myTruncatedPassword]";
document.forms["[myLogonForm]"].submit();

…and…

It Worked!

This got me back into the device, so I first navigated to the password change setting and reset it to an acceptable length, then verified that I could get back in using the new password.

Lastly, I wrote a detailed summary for the client to share with the device’s manufacturer so [hopefully] they’ll update future revisions to use consistent password lengths.

Teaming Intel PRO 1000 NIC cards in Server 2008 R2

I’m getting ready to upgrade Exchange from 2007 to 2010 at my office and have been having a tough time getting the Intel PRO 1000 Gb dual-port NIC cards to team (load balance) properly using their Advanced Network Services (ANS) software.

Beginning with Server 2008 R2, Intel started bundling those drivers with the OS Installation media, but without the ANS tools – the OS recognized the drivers, but without teaming or any other extended functionality.

After some digging, I came across a forum post on intel.com that shed some light on the issue:

http://communities.intel.com/message/69112

I was using a similar server (Dell Power Edge 2850) for the new Exchange 2010 installation, and naturally, I wanted to run it on the latest Microsoft Server OS, so I’d installed Server 2008 R2 and encountered the same issue as the author of the above post.

If you scroll down far enough, one of the members suggests using the Intel Networking solutions CD v15.3, extracting the contents, then using Device Manager to manually update the drivers for each NIC and browsing to the ..\PRO1000\Winx64 folder and searching it.

The next step suggested that you run the “..\V15.3_CD\APPS\PROSETDX\Winx64\ProSetDX.msi” file to install the ANS features after updating the drivers from the CD. This didn’t work for me and returned the following error:

Error 2869. The dialog SetupError has the error style bit set, but is not an error dialog.

This cryptic message didn’t really help, so I tried another executable in that folder, “DxSetup.exe”

Running that .exe file worked perfectly and I was able to setup ANS Team balancing on my Intel PRO 1000 dual port NICs.

I hope this helps someone!

Product Review: HTC Evo 3D

Update 11/05/2018: I hadn’t given this phone much thought until I learned about a product by RED called the Hydrogen One.  3D phones haven’t really caught on, and I’d be curious to see how much of an impact the Hydrogen One has on the market, but at a starting price of ~$1,300, 

My Sprint phone (an HTC Hero) was eligible for a trade up in March of this year, and I was ready for a new phone. While I enjoyed my Hero, there were a number of better phones out there for the money, namely, HTC’s Evo.

Background:
While I was very tempted to purchase a new Evo, I was encouraged by a colleague to hold out for the 3D version that was scheduled to be released sometime in the summer of 2011. Sprint announced the official release date of June 24, 2011 earlier this month, so I signed up for the pre-order and picked up my new phone this morning!

Interface:
While the interface itself isn’t 3D, it looks very sharp and is quite intuitive. The lock screen allows you to access common features such as your Phone, Mail, Camera and Messages. These can be customized to use other applications as well!

3D features:
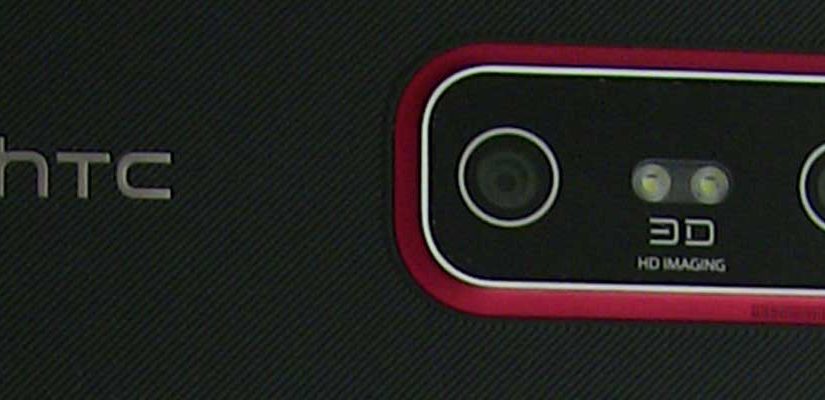
The 3D camera is very impressive, no glasses or other equipment needed! Just look straight into the screen and the images jump out at you!

The only drawback I noticed (and this has more to do with the user than the device) is that the quality of the 3D image or video is reliant on the steadiness of the person taking the picture or video.

It’s also important to note that images or video taken in 3D can only be rendered in 3D on devices that support it. Otherwise, you can always use the 2D/3D toggle switch to take images in 2D instead.

Overall impressions:
I’m really enjoying it so far! I’ve read reviews that stated some people had a hard time with the 3D images causing headaches and motion sickness after extended use but I haven’t experience this myself.

All in all, I think it’s a great phone for the price ($199 USD,  I paid $159 after getting a $40 credit for my HTC Hero)! I’d like to see more 3D content for it, but given that it’s brand spankin’ new, I’m sure there will be more to come over the new few months!

Rating: 9/10 (I would have given it a 10, but there’s always room for improvement).

Slipsteaming Drivers into Windows Setup CDs/DVDs

NOTE: This post was written almost 10 years ago, and republished here for posterity. As such, no attempt has been made to update the links or information below.

I recently had to repair an installation of Windows Server 2003. Unfortunately, Windows Setup was unable to automatically detect my RAID controller, and while you can press F6 during setup to provider a 3rd party driver, this won’t work for computers without floppy drives.

One solution is to “slipstream” the drivers you need into your Windows Setup media. Slipstreaming is a technique used to insert additional drivers, updates and service packs into your installation disks. This can be done manually by manipulating installation files, or by using a 3rd party tool such as nLite (vLite is the Vista version), AutoStream and PE Builder. I personally prefer nLite because it’s free, relatively easy to use, and works with a wide range of Microsoft OS’s. Best of all, you can also use it to remove unwanted or unneeded components, tweak system options, or set preferences in advance to create an unattended setup disk. Here’s procedure I used:

  1. Download and install nLite (https://nliteos.com/download.html)
  2. Copy the contents of your Windows setup CD to a folder on your hard drive (e.g. N:\Windows Setup Files)
  3. Start the nLite application, the click Next to advance to the source file screen
  4. Browse to the files you copied above, click Next again. nLite will detect the OS type, then click Next again to proceed
  5. The next screen gives you the ability choose a previous configuration if you have one, or you can click Next again to skip it and start fresh
  6. The next screen allows you pick and choose what features you want to manipulate, I chose “Integrate > Drivers” and “Create > Bootable ISO”, then Next to take you to the Driver selection screen
  7. Click Insert. If your driver directory comes with multiple .INF or .SYS files, you should select Multiple Driver Folder, otherwise, you can use Single Driver
  8. There will be a pop-up window prompting you to select a driver and a mode. The options are Textmode or PnP. Anything that you need to pre-load prior to installation should be installed as Textmode. NOTE: Be sure to use “Textmode” for any drivers windows will need to begin setup! I chose this option for my RAID controller drivers.
  9. Push Ok > Next to proceed, and when prompted, choose Yes to start the process
  10. When done, it should display the create window. At this point, you can create an ISO or burn the image directly to the CD There you have it!